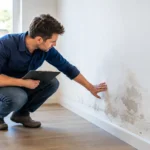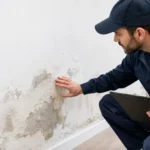
A period home damp case study is most useful when it starts with the evidence, not the sales pitch. In this Victorian terrace, the signs were familiar: blistering paint, crumbling plaster, a cold ground-floor sitting room and a white, powdery deposit appearing above the skirting boards.
The owner had already tried a dehumidifier. It collected water from the air, but the lower section of the wall continued to deteriorate. That was the key clue. This was not simply a ventilation problem. The pattern pointed towards rising damp.
The property and the visible damage
The property was a late Victorian, solid-brick mid-terrace house with a front sitting room, rear dining room and narrow entrance hall. Like many period homes, it had no modern cavity wall construction. Moisture affecting the masonry could therefore show through internally more quickly than it might in a newer building.
Damage was concentrated on the ground floor. The wall coverings were lifting to around one metre high in the sitting room, while the plaster near the chimney breast had softened and flaked away. There was a musty smell after wet weather, but no obvious leak from plumbing or the roof.
The owner had assumed the cold external wall was creating condensation. That can happen, especially where a room is poorly heated or ventilated. However, condensation usually appears on colder surfaces and around windows, corners or behind furniture. Here, the damage began at floor level and rose in a defined band. Salts were also visible on the plaster. Those details mattered.
Identifying rising damp before choosing a remedy
Rising damp is moisture travelling from the ground into masonry. In older houses, this can occur where the existing damp-proof course has failed, is missing or has been bridged by external ground levels, renders or internal alterations.
The first job was to rule out other moisture sources. Gutters and downpipes were checked, and there was no active plumbing leak. The external paving was also inspected to make sure it was not sitting too high against the wall. These checks are essential. An electronic damp-management device cannot repair a leaking pipe, overflowing gutter or damaged roof.
Once obvious defects had been addressed, the remaining pattern was consistent with moisture rising through the wall. The salt deposits strengthened that diagnosis. As moisture evaporates from masonry, it leaves mineral salts behind. Those salts can continue attracting moisture from the air, which is why a wall may look damp even after the original moisture movement has been reduced.
Why the dehumidifier did not solve the problem
The owner’s dehumidifier was not useless. It helped reduce airborne humidity and made laundry drying easier. But it was working on the room air, not the cause of moisture entering the wall from below.
Think of it like drying a puddle while a tap is still running. You may improve the surface temporarily, but the supply remains. A dehumidifier may be useful during the drying phase, particularly in a cold, occupied home, but it should not be treated as the main remedy for rising damp.
This distinction prevented the owner from spending more money on larger portable units, electricity and repeated redecorating. The focus shifted from hiding the symptoms to stopping further ground moisture travelling upwards through the masonry.
The period home damp case study solution
The chosen approach was a non-invasive electronic damp-management system. GUARDIAN devices are designed to address the electrical-potential difference that allows moisture to travel from soil into masonry, helping existing wall moisture return downwards through gravity.
This made sense for a lived-in period property. Chemical injection and extensive plaster removal can be disruptive, and the suitability of any treatment depends on wall construction, access and the actual cause of damp. The owner wanted an option that could operate continuously without digging up floors or stripping out the ground floor.
For a typical family house, the HOME model is selected for its coverage area. Larger or more complex premises may need PRO 15 or PRO 25 units, with placement planned so the required coverage reaches the affected parts of the building. A larger device is not automatically better. Correct positioning and suitable coverage are what count.
Installation: simple, but not casual
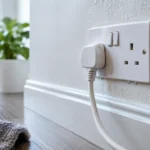
The device was installed centrally on the ground floor, away from large metal objects and major electrical equipment where possible. It was fixed securely to the wall and connected to a suitable mains supply. The owner was advised to leave it operating continuously rather than switching it off overnight or when away.
Placement is similar to positioning a Wi-Fi router. The signal needs to reach the area it is intended to protect. Putting it at one extreme end of a property, behind heavy obstructions or in an unsuitable location can reduce its effectiveness.
Before installation, the owner photographed every affected wall. This gave a reliable baseline. Damp improvement is gradual, and day-to-day visual checks can be misleading. Clear dated photographs, moisture readings where appropriate and notes on odours or plaster condition make progress easier to assess.
What happened during the drying period
The owner did not repaint immediately. That would have been a mistake. Walls that have held moisture and salts for years need time to dry. The drying rate depends on wall thickness, brick type, internal heating, ventilation, weather and the extent of previous saturation.
Over the first few weeks, the musty smell reduced. The room felt less clammy, although the visible salts did not disappear overnight. After several months, the lower wall showed fewer fresh damp marks, while damaged decorative finishes remained visibly affected. This is normal. A device can help stop the moisture source, but it cannot instantly reverse old plaster damage.
The owner kept the room gently heated and ventilated. Short periods of ventilation were used instead of leaving windows open all day in cold weather. Furniture was moved slightly away from external walls to allow air to circulate. These are sensible supporting measures, but they were not presented as a substitute for dealing with the rising damp itself.
Repairing plaster at the right time
Once the wall had been given adequate time to dry, loose salt-contaminated plaster was removed from the worst areas. The repair was then planned using suitable breathable materials for the period fabric of the house.
This stage needs judgement. If plaster is sound and only the decoration has suffered, major removal may not be necessary. If it has become friable, heavily salt-loaded or detached from the masonry, patch repair alone may not last. Replastering too early can trap moisture and lead to disappointment, so patience saves work.
The owner also avoided vinyl wallpaper and highly impermeable finishes on the affected walls. Period solid walls generally benefit from finishes that allow moisture vapour to escape rather than sealing it in.
The result after one year
At the one-year review, there was no new upward spread of damp staining. The room no longer had the persistent damp odour that had prompted the investigation, and the repaired wall remained stable through autumn and winter.
The biggest change was practical rather than cosmetic. The owner stopped treating the problem as an endless decorating issue. By checking for defects, confirming the damp pattern, choosing a source-focused solution and allowing a realistic drying period, the property had a clear plan rather than another temporary fix.
What this means for your period property
If your home has damp marks, salts, flaking plaster or mould up to roughly 1.5 metres above ground level, do not assume it is only condensation. Check rainwater goods, plumbing and outside ground levels first. Then look closely at where the damage starts and how it travels.
Period homes need practical solutions that respect how old walls work. The right answer depends on the cause, but when moisture is rising from the ground, endlessly drying the air will not deal with moisture inside the masonry. Deal with the source, allow time for the wall to dry, and repair finishes only when the building is ready.