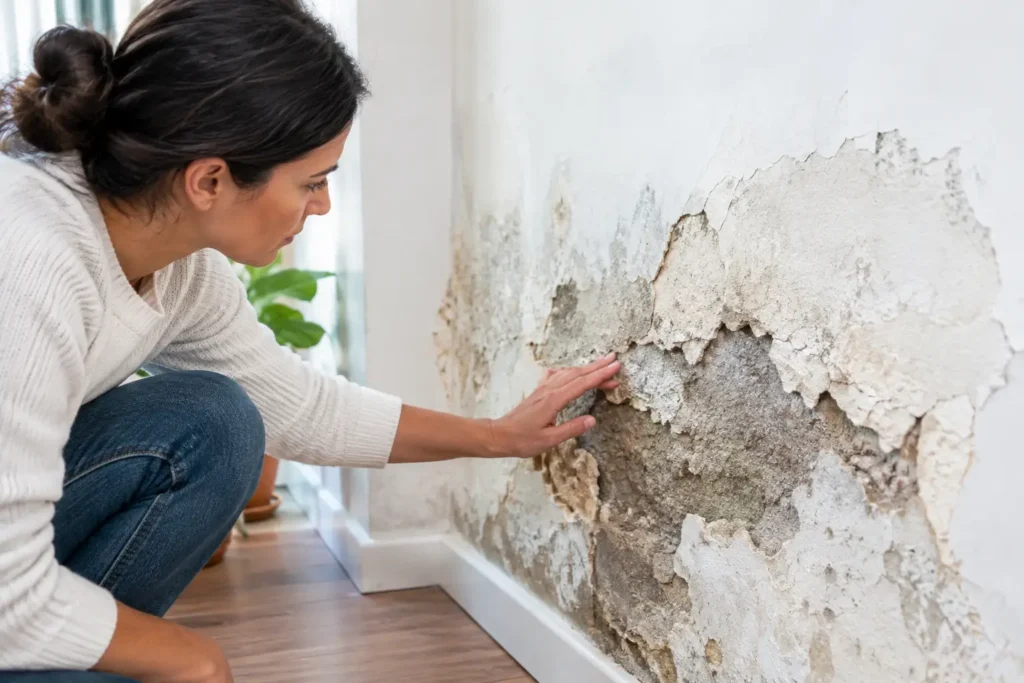
A wall that feels cold, looks stained and sheds plaster when touched is not simply an old decorating problem. The causes of crumbling damp plaster usually start behind the surface, where moisture has been entering the wall for long enough to weaken the finish and leave damaging salts behind.
Painting over it may make the room look better for a short time. It will not stop the plaster breaking down. The first job is to identify where the water is coming from, then remove or control that source before repairing the wall.
Why damp makes plaster crumble
Plaster is designed to stay dry. When masonry repeatedly absorbs moisture, water carries dissolved mineral salts from the ground, bricks and mortar towards the wall surface. As the wall dries, these salts crystallise. Their crystals expand within the plaster pores and push the material apart.
This is why damp plaster may blister, flake, turn powdery or fall away in patches. You may also see white, fluffy deposits known as efflorescence. In more advanced cases, the wall feels soft near the skirting board and the finish can detach right back to bare brick.
Moisture also creates a colder wall surface. That makes condensation more likely, especially in bedrooms, kitchens, basements and poorly ventilated ground-floor rooms. Mould can then grow on the surface, but mould is usually an added symptom rather than the original cause of failed plaster.
The main causes of crumbling damp plaster
Rising damp from the ground
Rising damp is a common cause of damage at the bottom section of external and internal ground-floor walls. Moisture travels from surrounding soil into porous masonry and can appear up to around 1.5 metres above ground level. The exact height depends on the wall materials, salt levels, evaporation and how long the problem has been present.
Typical signs include a horizontal tide mark, peeling paint, stained plaster, salt deposits and decayed skirting boards. Damage is often worse near the floor and gradually reduces higher up the wall.
A failed, missing or bridged damp-proof course can allow this process to continue. Bridging happens when soil, paving, render or internal debris creates a route around the barrier. Older properties may also have no effective damp-proof course at all.
Penetrating rain and external defects
Not all low-level damp is rising damp. Rain can enter through cracked render, damaged pointing, blocked gutters, overflowing downpipes, defective flashing or worn roof coverings. If the damage worsens after heavy rain, appears on an upper wall, or is concentrated beneath a gutter or window, investigate external water entry first.
Solid brick walls are particularly vulnerable when their outer surface is left exposed to repeated rain. A small fault can keep a section of masonry wet for months. The plaster on the inside then begins to fail, even though the water source is outside.
Leaking pipes and hidden plumbing faults
A slow leak behind a kitchen unit, under a bathroom floor or within a heating pipe can soak a wall without obvious flooding. The affected plaster may feel damp in one localised area rather than across an entire wall. Water meters that move when no taps are running, stained ceilings below bathrooms and a persistent musty smell are useful warnings.
Do not assume every damp patch is a building defect. A plumbing leak needs to be repaired before any drying or replastering work begins.
Condensation and poor ventilation
Daily living produces litres of moisture through showers, cooking, drying clothes and breathing. When that warm air meets a cold wall, it turns into water droplets. Repeated condensation can soften paint, encourage mould and damage plaster over time.
Condensation is usually most visible on windows, in corners, behind furniture and on cold external walls. It is more likely during winter and may improve when ventilation and heating are managed properly. Unlike rising damp, it does not normally create a clear tide mark or heavy salt contamination at the base of a wall.
An air dehumidifier can help reduce airborne humidity and condensation. It cannot stop ground moisture travelling through masonry, repair a leaking pipe or correct defective guttering. Treating the wrong problem wastes electricity and delays the real repair.
Salt-contaminated plaster after the wall dries
This point catches many property owners out. Even after the original moisture source has been stopped, plaster may remain contaminated with hygroscopic salts. These salts attract moisture from the air, so the wall can still look damp in humid conditions.
In this situation, the masonry may be drying but the finish is no longer suitable. Salt-damaged plaster often needs to be removed and replaced with a compatible system once the wall has had time to dry. Repainting straight away can trap the problem behind a fresh coat.
How to tell whether rising damp is likely
Start with the pattern, not just a single damp reading. Rising damp normally affects ground-floor walls and begins at low level. Look for deteriorating plaster, salts, staining, rotten timber at the wall base and a line of damage that rises from the floor.
Then check the basics outside. Ground levels should not sit above the damp-proof course, drains should clear properly, and gutters and downpipes should not discharge against the building. Check for cracked render, damaged brickwork and obvious plumbing leaks inside.
It depends on the property. A Victorian solid-wall house can behave very differently from a modern cavity-wall home, and a basement may have lateral water pressure rather than rising damp. Where the diagnosis is uncertain, professional inspection is sensible before committing to invasive work.
Stop moisture before repairing the plaster
A lasting repair follows the right order. First, stop the water source. Repair leaks, clear rainwater goods, correct external ground levels or address the rising damp mechanism. Next, allow the wall to dry naturally. This takes time because thick masonry does not dry overnight.
For persistent rising damp, GUARDIAN damp removal is designed to address the electrical-potential difference that draws ground moisture into masonry. The device operates continuously and is intended to support moisture returning down through the wall by gravity, rather than simply removing humidity from the room air.
Once the wall is genuinely drying, remove loose, hollow or salt-loaded plaster. Do not keep tapping at sound material just to make the repair larger. A competent plasterer can assess how far contamination extends and select a breathable, salt-resistant replacement finish where needed.
Avoid sealing a damp wall behind waterproof paint, vinyl wallpaper or non-breathable coatings unless a suitable system has been specified for the wall. These finishes can hide visible signs while moisture and salts continue working behind them.
Practical checks that prevent repeat damage
Keep external ground levels below the damp-proof course where possible, and make sure surface water drains away from the building. Maintain gutters, gullies and downpipes before winter. Inside, leave a gap behind large furniture on cold external walls and use extractor fans when cooking or showering.
If you are drying a room, gentle background heat and controlled ventilation are usually more useful than intense heat followed by cold air. Keep records of photographs, moisture patterns and repairs, especially in rented or commercial properties. A clear history helps identify whether the issue is seasonal condensation, rain penetration or an ongoing ground-moisture problem.
Crumbling plaster is the wall asking for attention, not a reason to reach for filler. Find the moisture route, stop it, give the masonry time to dry, and only then restore the surface properly.